The steps to make an AI video, from idea to publish
By Christophe Paka · Facts checked on 23 October 2026
"Newbie ... starting from scratch and don't even know which platforms or websites to use yet!" One reader opened a forum thread with those words. Another got a first bill and asked if AI video is always this costly.
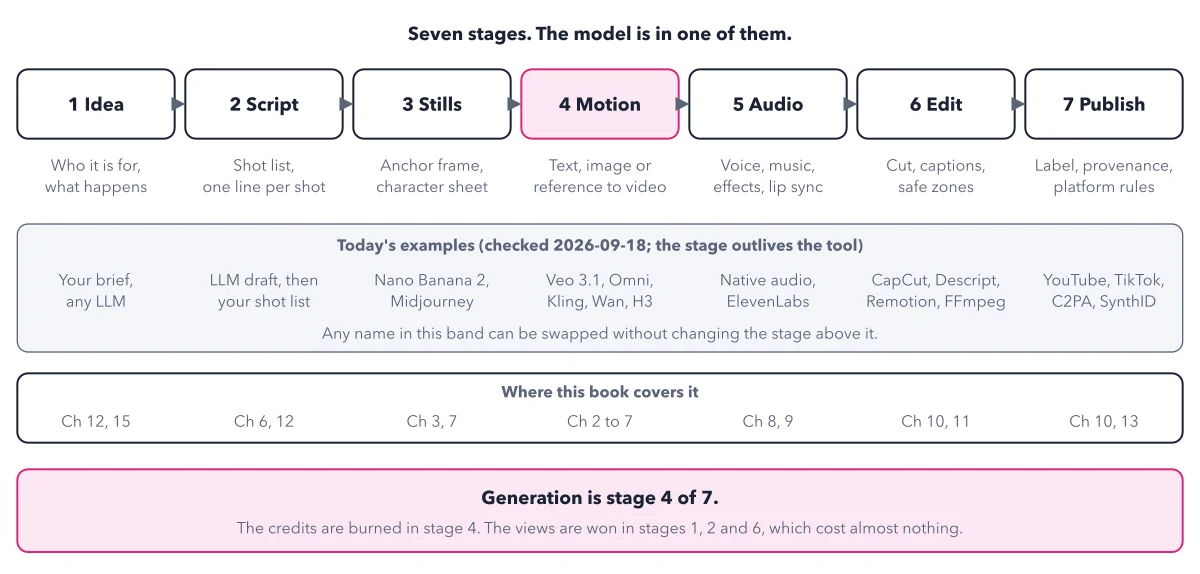
Both readers think of AI video as one box: type a prompt, get a clip. So they spend credits on the box and skip the rest. There are seven steps to make an AI video, and the AI model sits in only one of them. The book calls each step a stage. The figure below lays out all seven, shows where the money goes, and shows where the views come from.
How to read this figure
Read the top row left to right. Seven boxes run from idea to publish: idea, script, stills, motion, audio, edit and publish. Each box is a stage with its own tools. That is why two AI video products can do quite different jobs.
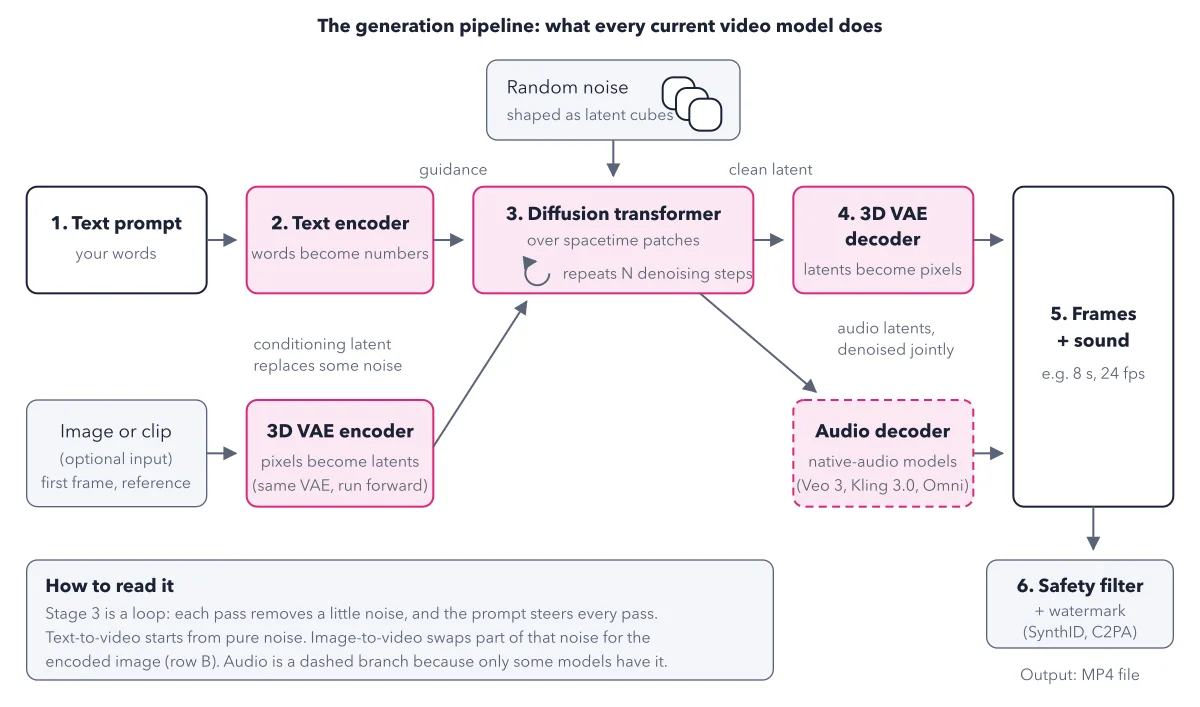
Find the pink box: stage 4, motion. Stage 4 is where the video model, the AI program that turns text or a picture into moving frames, does its work. It is the only stage where the model spends your credits, the prepaid units a service uses up for each clip. How the model works inside stage 4 has its own figure.
Read what each stage holds. Under each box is its job: a shot list, an anchor frame (the still a clip starts from), voice and music. The edit adds cuts, captions and safe zones. On a phone, apps such as Instagram Reels lay their own buttons and text over the top and bottom of your video. The safe zone is the middle part they leave clear, so keep captions and logos there.
Treat the grey band as swappable. The grey band names example tools for each stage, from any chatbot for the brief to CapCut or FFmpeg for the edit. Any name in the band can be swapped without changing the stage above it. Learn the stages; the names will change.
End on the bottom bar. Generation is stage 4 of 7. The credits burn there, but the views are won in stages 1, 2 and 6: the idea, the script and the edit. Those three cost almost nothing, so put your effort there first.
Read the publish box last. Stage 7 names label, provenance and platform rules. A label is a mark such as "AI generated" that the platform shows under a video. Provenance is a hidden record in the file of how it was made; C2PA and SynthID in the grey band are two kinds. The platform can read that record and add the label for you.
Key takeaways
- Write who the video is for and what happens in it before you open any video tool.
- Price a clip by takes: count every try, not only the one you keep.
- Keep your prompts, pictures and voice files on your own disk, outside any tool.
Worked example: one mug ad through the seven stages
The book's running project is a short upright ad for a white mug printed MONDAY. Follow it through the stack and note which stage costs credits.
- Stages 1 and 2, idea and script: one line says who it is for, and a shot list gives one line per shot. Cost: no credits.
- Stage 3, stills: a clean photo of the mug, so the letters are right in frame one. Cost: no credits.
- Stage 4, motion: in Flow, Google's video app, an 8 second Omni Flash clip costs 12 credits. On Google's developer service, which bills by the second, one 8 second clip is about $0.80, and three takes to get one you like cost about $2.40.
- Stages 5 and 6, audio and edit: a voice tool adds the line, and the editing app adds captions away from the safe zones. Cost: almost nothing.
- Stage 7, publish: the platform may show an AI label. It comes from the box you tick when you upload, or from the platform reading the file's provenance record. YouTube says disclosure "won't limit a video's audience or affect its monetization eligibility". So tick the box when the clip could pass for real footage, and keep the original file.
Result: Only stage 4 spent credits, and it spent them per take. So the money question is never "what does a clip cost?" but "how many takes until I get one I can use?"
Questions readers ask
I'm starting from scratch. Which tools do I need to make an AI video?
Think in stages, not brands. A chatbot writes the plan, a picture tool such as Midjourney makes the opening still, a video model such as Veo or Kling adds motion, a voice tool such as ElevenLabs speaks the lines, and an editor such as CapCut or Descript finishes the job. These are examples from the figure. Start with one tool per stage and swap any of them later.
Why is AI video so expensive?
Because you pay for every try, not only the clip you keep. The price on the page is per take, and a clip is rarely right on the first take. Count takes per usable clip, and draft on the cheapest setting before you pay for a final.
Does an AI label hurt my reach?
YouTube says disclosure "won't limit a video's audience or affect its monetization eligibility". Some creators report fewer likes after a label, but those are single reports, not measured. For paid ads, the TikTok and Meta pages the book read state no delivery or rejection rule for labelled videos.
Should I learn the best model this month?
Learn the seven stages and what each model can be given instead. Tools are renamed, replaced or switched off every few months, and Sora's app and developer service are both gone. The stages stay the same when the names change.
Sources: Video generation overview (Gemini API); Flow help: credits per plan and per generation; Gemini API pricing.
This figure is from AI Video Made Crystal Clear, chapter 1.
The chapter builds the idea step by step, with recipes you can follow, a Try it to check yourself, and every source.
Get the book