The +1 Method · chapter 7: Hold Back
The hold-back zone
2026-10-27
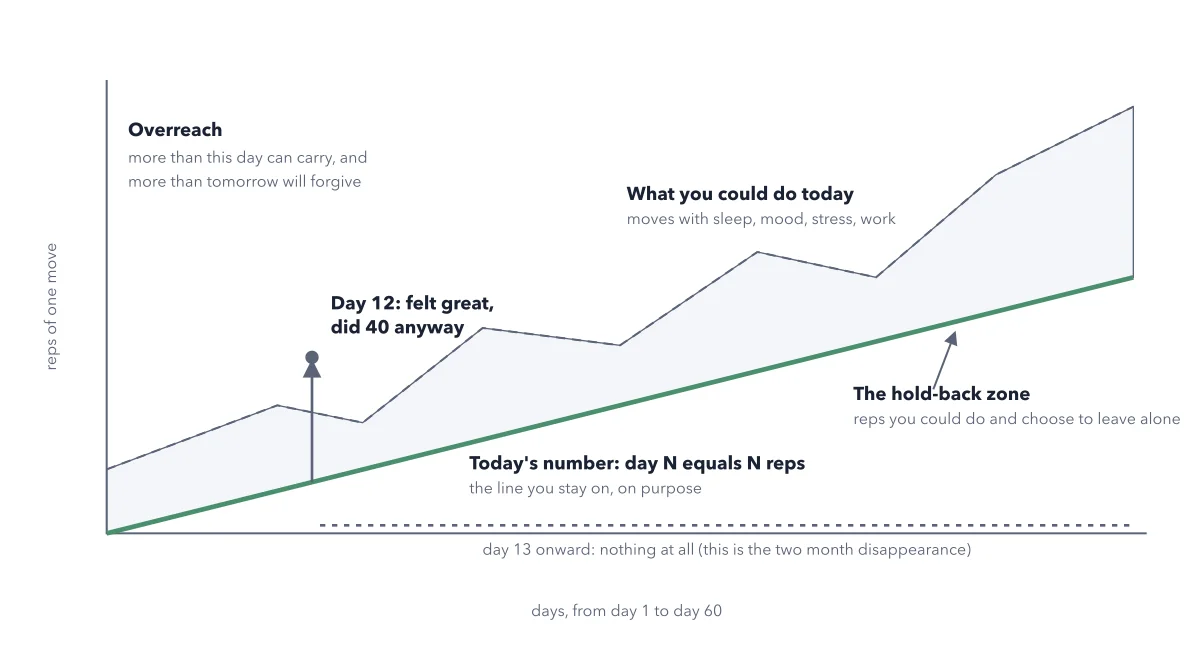
Your capacity wobbles from day to day and sits well above the ramp. The +1 line ignores all of that and asks for the same modest thing every day. The shaded gap is not waste, it is the margin that lets tomorrow happen. The single spike on day 12 buys 40 reps once and costs everything after it.
Below: the paragraph from the book that builds this idea, then the diagram itself (Figure 7.1), and a recap. About a minute of reading.
Hold Back is simply the rule that you never take the loan. Figure 7.1 draws what that looks like over two months: what you could do on a given day, the line you deliberately stay under, and the one spike that ends a run.
Recap
- The idea: Your capacity wobbles from day to day and sits well above the ramp.
- The picture: Figure 7.1, from chapter 7 ("Hold Back") of The +1 Method.
- Go deeper: the chapter builds this step by step, with recipes and sources at the end.
This diagram is one of many in The +1 Method.
Every chapter opens with the gist, draws the hard ideas, and ends with recipes and sources.
Get the book